It's no secret that I'm enamored with decorative and handmade papers. After all, the name of my studio, linenlaid&felt, is all about paper textures: linen, which is embossed with distinctive weaves; laid, which features impressed lines; and felt, with its mottled texture.
However, even with all of the gorgeous papers that are available, some patterns do surface often in bookbinding. That's why I'm so excited to share one of my recent projects.
I
wanted to create something really unique, that no other book artist
would have. I wanted to create my own patterned papers. This would allow me to bind books with all of the materials purposefully chosen, right down to patterns that I illustrated and printed by hand.
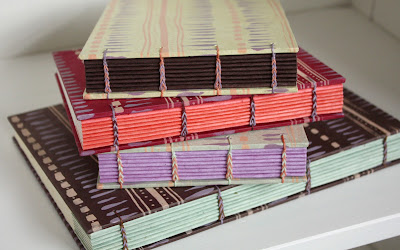
Inspired by a recent exhibit at The Frist Center in Nashville, I completed a series of sketches, followed by inked illustrations, then screenprinting onto papers and leathers, and finally books bound with those materials. A handful of these unique books are now
available in my Etsy shop.
Here's a look at the process, step by step.
 Step One: Sketching
Inspiration first struck during a visit to the Frist's
Art of the Ancient Americas exhibit. I think I've always enjoyed ancient art more than most friends my age, perhaps because of the incredible collection that I grew up visiting at the Art Institute of Chicago.
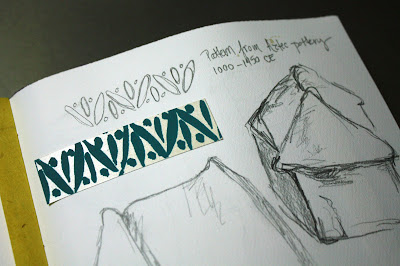
After seeing the exhibit and a guided tour one time, I returned with my sketchbook (yes, one that I made by hand) and got to work on some sketches. I captured some shapes from Peru, took interest in a ceramic llama, and took a few turns drawing some Mexican homes. Ultimately, an Aztec pottery pattern was among many inspirations blended into patterns.
 Step Two: Ink illustrations
On the day I pulled out my India Ink it didn't take long for every surface in my studio to become filled with illustrations that needed to dry. For some, I worked meticulously with a pencil grid, but for others, I worked very quickly, making slashes, dotted and dashed lines, and vaguely organic shapes.
 Step Three: Screenprinting
If you've never screenprinted before, I can briefly describe the process. First, I turned my inked illustrations into transparencies using a photocopier. The transparency is then placed onto one of the fine mesh screens used by printers, which has been treated with light-sensitive emulsion. The screen is then exposed to light, which burns the pattern into the screen. When it comes time to print, ink can only pass through the areas you've chosen based on your pattern.
I took care to mix my own inks in colors to coordinate with all of the handmade Lokta papers that I brought into the print studio for this project.
I printed nearly 100 sheets and also dabbled with screenprinting onto leather.
 Step Four: Binding
Once I had all of these materials at hand, I had a lot of momentum to begin binding. I also used this as an opportunity to sift through my paper collection to explore color combinations. I also decided to use the four-needle Coptic binding style, which allows for two thread colors along the spine, and a chance to go even further with color schemes while quite literally bringing everything together.
I'm excited to use these screenprinted papers in the future. For now, I've bound four Coptic books with the screenprinted papers, and four with screenprinted leather covers. I hope you'll take a look at each one in the shop and share them with friends!
Read more...


